Saturday, March 9, 2013

Floral Frames Easter Basket

Floral Frames Easter Basket

I would probably say with out a doubt that Stampin' Up! framelits are my absolute fav.  So of course when I saw this basket on Brenda Quintana's blog I just knew I had to make it.  It was so cute that I decided that we would make it in class.  The girls loved it!  Like I said before my fav and I don't think I have had a class that I haven't used them in.  Can't wait for the new catalog in hopes that there will be more of them headed our way. Anyways back on to topic. Here is the basket completed.  I changed mine a bit to make it a little more sturdier. 


Ingredients:
CS - Primrose Petals, Lucky Limeade, Pool Party, Whisper White
DSP - Brights Patterned Paper, Daffodil Delight
Ink - Primerose Petals
Framelits - Floral Frames
Ribbon - 3/8" Ruffled Ribbon - Lucky Limeade, Pool Party
Punch - 1 1/4"scallop punch 
Stamp Set - Spring Sampler # 125512 (spring catalog pg. 23)
Big Shot
Simply Scored Scoring Tool

Step 1 - Using the largest flower from the floral frames framelits cut out the Primerose Petals. 
Step 2 - Using the second to largest flower cut the Daffodil Delight patterned DSP.
Step 3 - Adhere the flowers together.
Step 4 - Starting with Daffodil side up score the flower tip all the way across to the other flower tip on the opposite side. The easiest way to do this is to mark the 6" grove on your scorer at the top and then another mark just below your flower  to make lining it up easier. Do this four times all the way around your flower.
Step 5 - Flip over flower and score the indented parts of the flower all the way across just as you did in step 4.
Step 6 - Using Pool Party card stock cut out both the smallest flower framelit and the second to smallest flower framelit.
Step 7 - Take the smallest flower and adhere it to the middle of the larger flowers.
Step 8 - Fold flower like an accordion.
Step 9 - Cut a 3/8" x 8" strip of Lucky Limeade CS. This will give the ribbon strength in order to keep it's shape. 
Step 10 - Cut a 8" piece of lucky limeade ruffled ribbon and adhere it to the Lucky Limeade strip.
Step 11 - Put a piece of sticky strip on the ends of the lucky limeade strip and adhere it to the lower sides of the flower basket.
Step 12 - Adhere the second to smallest pool party flower to the bottom of the basket.
Step 13 -  Stamp your image 
Step 14 - Punch out your image using the 1-1/4" scallop circle punch
Step 15 - Punch a small hole in the top of the scallop and run the pool party ribbon through it.
Step 16 - Attach scalloped punch image to the handle of the basket.
Step 17 - To finish it off add a cellophane bag filled with treats.  


Hope you enjoyed this project and thanks for stopping by.


Saturday, March 2, 2013

March - Best of 25!


The new Best of 25 years March set is out with 1 of my most favorite stamps, the Hydrangea!
Click here to order yours today!
Remember to hang on to your proof of purchase sticker. For every six you collect you can send in your collectors card for a free stamp set worth up to $14.95.

Friday, March 1, 2013

Introducing Photopolymer

Introducing Photopolymer by Stampin' Up!
Brand new completely clear stamp set now available,  click here to find out more!
To watch a video and order please click here or click on the promotions tab at the top of my blog.
What are you waiting for?  Order now, I have!


Wednesday, February 13, 2013

Wunderle Wednesday Class Project More Amore

Wunderle Wednesday Class Project More Amore
Finally got a picture of our last class project.  I couldn't wait to try out the Honeycomb embossing folder with the new Core'dinations card stock.  What a great effect. I did find that when sanding you have to sand very gently otherwise the paper will rip right in half. 


Ingredients:
CS - Pool Party Core'dinations, Very Vanilla
DSP - More Amore
Stamp set - That's the Ticket
Punch - Ticket Builder, Bitty Butterfly
Designer Build a Brad
Ribbon - Two tone Pink Pirouette/Rose Red, Flower Trim
Artisan Embellishment kit
Framelits - Hearts a Flutter
Ink - Pool Party, Rose Red
Stampin' Sanding System


Monday, February 11, 2013

Silver Glimmer Memorable Moments 4th Birthday Card


Silver Glimmer Memorable Moments 4th Birthday Card

Happy Birthday to my niece!  She turned the big 4 this year and she is starting to do the girl thing with all the glitter and bows.  I wanted to make her a card that would sprinkle as she would call it. I figured with all of the free Sliver glimmer paper that we were getting with our orders that I wouldn't hoard all of the sparkly paper for myself.  Four is a big number for her so I made her a full card out of the sliver glimmer paper.  


I don't know if you can see it but I ran it the glimmer paper through the honeycomb embossing folder for that extra girly pop.


Ingredients:
CS - Pink Pirouette, Rose Red, Pretty in Pink, Primrose Petals
Ink - Primrose Petals
Glimmer Silver 12x12 paper
Stamp set - Memorable Moments
Framelits - Labels Collection
Embossing folder - Honeycomb
Paper Piercing Pack - Festive
Artisan Embellishment kit
Rhinestone basic jewels
Frost white shimmer paint


Saturday, February 9, 2013

Melted Valentine Heart Crayons

Melted Valentine Heart Crayons
The kids and I saw this on Pinterest and we decided this would be part of our valentines instead of giving out chocolate.  Here is how we melted our crayons.
Pre-heat the oven to 250 degrees. While the oven is heating put your crayons into a bowl of warm water so that the paper of the crayons will peel off very easliy.


Next you will want to break up the crayons.  I tried a couple of different ways including letting the kids smash them with a hammer inside of a bag but in the end I preferred laying wax paper over a cutting board and then chopping them with a knife.  I made the pieces different sizes and we grouped them into color groups.  Lighter color for girls darker for boys.


We then put the pieces of crayons into the silicon molds that I found at Target in the $1 section.  These actually said they were for ice-cubes but I figured since they were silicon that they won't melt in the oven and they didn't.  It looks like I forgot to take a picture of this step but we just filled each one of the hearts up to the top with the broken up crayons.

Once the oven was heated to 250 I put the silicon trays onto a cookie sheet covered with wax paper (in case of spills) and placed in the oven for 15 mins. 

The wax melts in a fun, beautiful almost tie-die design.


After you take them out of the oven let them cool completely.  
Then after they are cooled pop them out of the silicon trays a there you have it.
Crayon Hearts.


This was a fun project for me and the kids to do together and can be done with any silicon form.


Kids Valentines with Heart Crayons

Kids Valentines with Heart Crayons

For this valentines day I wanted to come up with something very easy for the kids to make to give their friends for valentines day instead of candy.  Here is what I came up with.  I got the template for the valentines from remarkablycreated.com and printed them out.  The kids and I then melted some crayons down and formed them into hearts.  We choose to melt lighter colors for the girls and darker colors for the boys. I will post in another post how we melted them.  These valentines were very easy for them to make almost all by themselves and they came out very cute.  My worry now is that their friends won't realize that the hearts are crayons and not icky tasting candy! 


Ingredients:
CS: Pink Pirouette, Island Indigo, Daffodil Delight
Ribbon: Pink Pirouette grosgrain
Punch: the star from Merry Minis
Silicon heart mold tray
crayons
Clear envelopes


Tuesday, February 5, 2013

Hearts a Flutter Four Leaf Clover St. Patty's Day


Hearts a Flutter Four Leaf Clover
I saw this heart stamp used as a flower and thought how cute would it be if I used it as a four leaf clover. 
So here it is: It would be a very cute hostess gift.  My idea was to put some candy in the cello-bag but I didn't have any at the house. The kids must of eaten all! (right!) The marker worked just as good. 

Ingredients:
Stamp set - Hearts a Flutter and Itty Bitty Banners
Framelits - Hearts a Flutter and Bitty Banners
CS: Whisper White and Gumball Green
Ribbon - Gumball Green (retired)
Cello-bag


Monday, February 4, 2013

February's Best Of...

February's Best Of...25 years is out. Start your collection today! 
Remember to hang on to your 25-year proof of purchase sticker, and adhere it to your Stampin’ Up!® collectors card, which is included with each stamp set.

For every six Best of sets

you buy, you can send in your collectors card for a FREE
set of your choice valued up to $14.95!

Must be redeemed by April 30, 2014. 


Saturday, February 2, 2013

More Amore class projects


More Amore class projects.
What a fun night we had! I had more girls then normal which was a blast and I got to meet my newest recruit Kathy! Who also is having her first party today! WHOOT WHOOT!
To be honest wednesday day all day I was worrying how class would go since I decided to change it up a bit by setting up stations for each project. With a larger number of girls I thought it would work better that way and it did!  No one was waiting for anything and no seemed to mind moving from table to table which was my biggest concern. Everyone seemed to enjoy the projects and I would love to see them back for this months class. 
For this card I thought I would do a lot of layering to show how effective it is.


Ingredients:
CS -  real red, basic gray
DSP - More Amore
Ink - pool party, primrose petals, basic gray
Framelits - hearts a flutter, bitty banners
Ribbon - 5/8" crochet trim, 1/8" taffeta very vanilla
basic designer buttons
Stamp Sets - Hearts a Flutter, Itty Bitty Banners


Our second project was a fun little project that I got from Pinterest posted by Heidi Boos.
It's a pull up sweetheart candy box. 


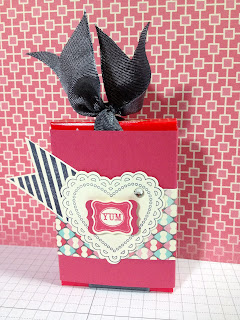
Cut CS to 6-3/4" x 3-1/4"
Cut DSP to 6" x 1-1/2"
score cs at 5/8", 3", 3-3/4" and 6-1/8"
Cut ribbon to 15", wrap around the length of the box and then double knot on the top.
Snip the tops of the ribbon in a "V". 
Place a piece of sticky strip on one end of the scored cs.
Wrap the card stock around the box and adhere together on the side.
Wrap the dsp around the middle of the candy box with the two sides that don't meet up in the front. Add embellishments to the front to cover up the dsp not meeting up in the middle. 
(Heidi figured this would maximize the full 12x12 sheet of DSP, great idea)
Ingredients:
CS - primrose petals, very vanilla
Ink - primrose petals, basic gray
DSP - more amore
Stamp Set - Hearts a Flutter, Pretty Petites
Punch - Petite Curly Label 
Framelit - Hearts a Flutter
Rhinestone - Basic Jewels
Ribbon - 1-1/4" Two Tone Basic Gray/ Basic Black

We did 1 more project that I still need to take a pic of so I will be posting that one a little later.
Thanks for stopping by!


Friday, January 25, 2013

I was Soapin' you'd be my valentine


Need a very cute, handmade teacher valentine?  
Here's an idea that I got from Pinterest of course.
I made the tags using MDS and pink pirouette grosgrain ribbon.


Wednesday, January 23, 2013

More Amore

Whats the best way to show someone special how much they mean to you?
 With a one of a kind handmade card of course!


Ingredients:
Cs - pool party
DSP - More Amore
Framelits - Hearts a Flutter
Big Shot
Lace - Artisan Embellishments kit
Ribbon - 1-1/4 two tone pink pirouette/rose red
Designer builder brads
Stamp sets - Hearts a Flutter and My Little Valentine
Punches - Ticket duo builder and Bitty Butterfly
Ink - versa mark and pink pirouette


Monday, January 21, 2013

Has the thought crossed your mind?

Has the thought crossed your mind about becoming a Stampin' Up! Demonstator?  Well if it has this is the perfect time to join the family. 
Starting today if you sign-up during Sale-a-bration Stampin' Up! is offering your completly customized starter kit worth $156.50 for only $99. That's a 25% discount! And why 25% you ask? Because it is Stampin' Up!s 25th anniversary. 
Check out just some of the benefits of becoming a demonstrator below. 


PRODUCT DISCOUNT

Demonstrators get a 20 percent discount on all Stampin' Up! products, including stamp sets, paper, and accessories. It's a great way to support your love of stamping, paper or digital crafting, home décor - or whatever your passion may be!

EXTRA INCOME

You'll earn extra income based on your sales and recruiting - just how much extra income is up to you. Maybe you want enough income to pay the electric bill every month, or maybe your goal is bigger - the monthly payment for your new car. That's the beauty of the demonstrator experience - it's all up to you! See the Compensation Table for more information.

FLEXIBLE SCHEDULE

This is your business, so you can put as much (or as little) time into it as you'd like!

SUPPORT FROM STAMPIN' UP!

We love our demonstrators and it shows through our demonstrator support materials. Workshop ideas and audio and video trainings on all kinds of topics are available at your fingertips on our demonstrator website. Plus, you'll receive our monthly magazine just for demonstrators, which is full of informative tips and beautiful samples.


If you are interested and want more info please call or email me and I can tell you about the other benefits that are being offered to all demonstrators. You can also click here to Join. or the tab at the top of my blog named Join in will also give you more info.

I would love to have you on my team and "To love what we do and share what we love, as we help others enjoy creativity and worthwhile accomplishments . . . in this we make a difference!"


Saturday, January 19, 2013

My Paper Pumpkin


It's so easy to get started. Simply sign up for the program starting Monday, January 14 by visitingwww.mypaperpumpkin.com and click Get it. Every month a new, surprise project kit arrives at your doorstep. Just think of the anticipation of creating a fun project to pin, showoff, and share with your friends and family-every month!
Of course, you'll want to know more. So here's the nitty gritty:
  • Each month we send you a unique, surprise kit with a project-cards, journals, décor, and more! (We've even color-coordinated, measured, and cut everything for you!)
  • Each kit includes stamps, ink, paper, and accessories-everything but adhesive.
  • Each kit gives you and your customer a 30-minute creativity escape.
  • We will ship your Paper Pumpkin on or around the 15th of the month.  
  • You need to sign up for a kit by the 10th of the month to get that month's kit. If you sign up on the 11th of the month, your first kit will come the next month. (Let's say you sign up on May 10th, we'll send your kit around May 15th. If you sign up on May 11th, we'll send your first kit around June 15th.)
  • A Paper Pumpkin membership is $19.95 per month (and shipping is included!) The commissionable amount is $14.95 for each Paper Pumpkin.  
  • There's no commitment, you can cancel your monthly Paper Pumpkin at anytime. You can also skip a month if you want.
  • Starting in early March, we'll offer a Try-It kit if you'd like to try Paper Pumpkin for one month.


Tuesday, January 15, 2013

Dude, You're Welcome!


This set is for the men in our lives however, I'm already seeing the endless possibilities for myself!
Included in this set is everything a "Dude" needs to build the perfect or maybe not so perfect card.
The "Dudes" in the home office at Stampin' Up! helped launch this product.  Below is a funny video that they put together. 
In the set your dude will receive:
  • Four wood-mount stamps (double-mounted) with the perfect sentiment for every occasion
  • Twelve 4" x 6" postcards in four different (manly) colors
  • Twelve gray envelopes
  • A Basic Gray Classic Stampin' Pad
  • An instructional guide (for the most novice stamper!)
Basically, the kit includes everything a dude needs to create the perfect manly card that any woman would adore, all packaged in an appropriately masculine box.
This set is ready to go out for delivery now so click here to order.

Item
Description
Price
132807
Dude, You're Welcome! Kit
$24.95